
When we talk about laptop overheating issue, the top answers that you’ll find are always…..
- cleaning your laptop from dust
- buy a laptop cooling pad
While not neglecting the effectiveness and importance of those answers, the best solution is even simpler and cheaper than that!
Let’s take a look at my case. I have an ASUS N552VX, a pretty good laptop that comes with Samsung SSD, 8GB of RAM, Intel Core i7-6700HQ and Nvidia GTX950M. It suits for doing all kinds of multimedia work and for playing games. But the problem is, although my laptop can do all of those things, it’s useless because it will make my laptop CPU temperature jump beyond 90 degree celcius (TJ Max is 100 degree celcius)! Insane, right? I have done many things like using the lowest video/graphic settings in games, assign less CPU doing a certain process, buy a cooling pad, buy a vacuum cooler, make my own cooling pad, cleaning my laptop fan, changing my laptop thermal paste, buy an anti-virus to check if there’s a virus that caused overheating and playing in a cool room. Nothing works! N-O-T-H-I-N-G. In the end, I just come to the conclusion that this laptop cooling system sucks. Until I realize one thing……….
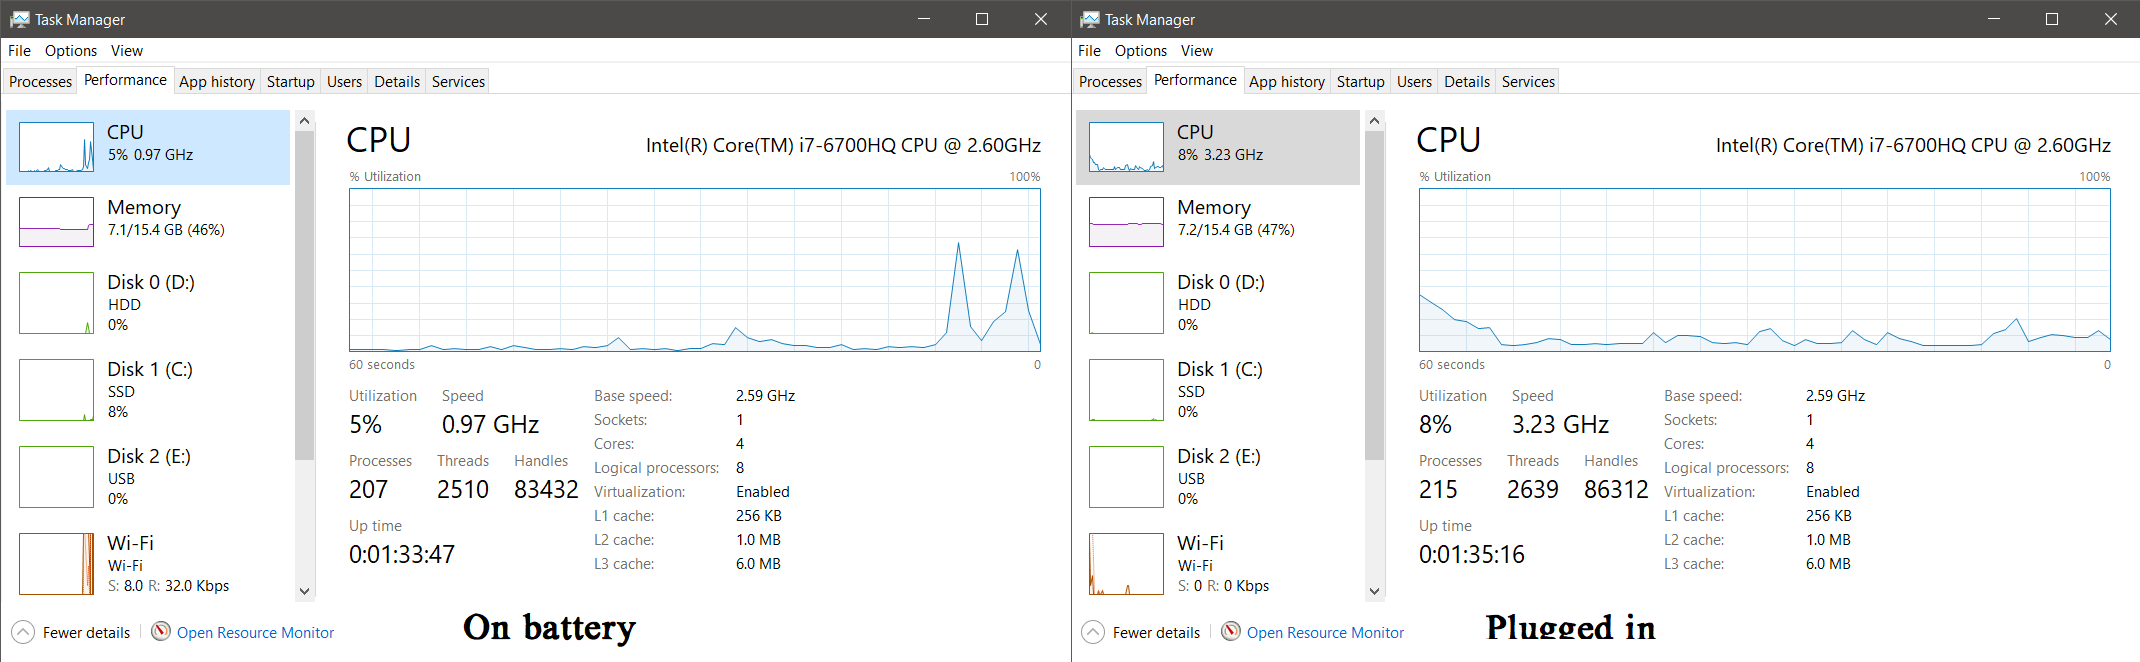
I realized that my laptop temperature isn’t as hot when it’s on battery. The moment I turn on the charger, the temperature starts to jump up. After doing some ‘detective work’, the reason why it’s hotter when charging is not because ‘charging = energy = heat’. Well, that is true too but that’s not the case here. The real reason is because my CPU speed is almost 4 GHz when the charger is on but at 2 GHz or lower when it’s off. That. That is the culprit.
So here’s how I overcome the problem…
Assuming you’re using Windows 10,
- Go to Start and search for "Choose a power plan"
- On the left hand side, click "Create a power plan"
- Go for default plan (Balanced) and then click "Next" and “Create".
- After clicking "Create", you will return to this page. Click "Change plan settings" on the newly created plan
- Click "Change advanced power settings"
- Expand "Processor power management"
- Expand "Maximum processor state"
-
Change to "50%" for
"Plugged in"
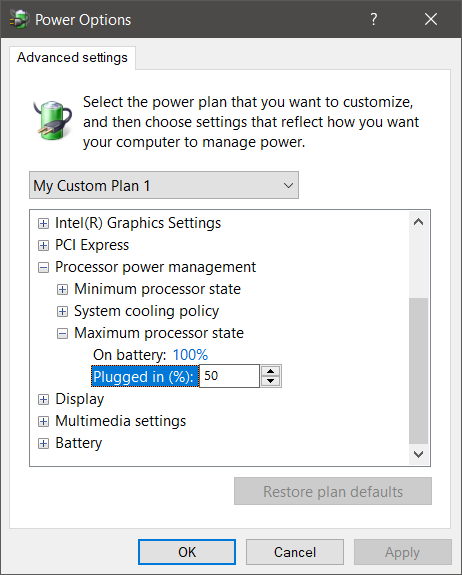
- Click Apply and OK
-
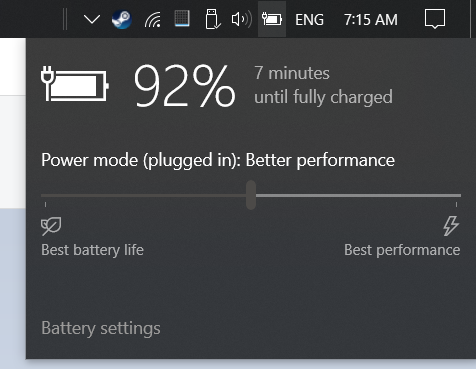
While on charge, click on the battery icon in the taskbar, and bring the
slide to the center (Better performance).
You may explore other settings in the Power Options but the one I mentioned above is the most important to overcome the overheating issue. While doing this will reduce your laptop performance a little bit especially for low-end laptop, for me, it’s much better than making your laptop work at full speed but putting it at risk of damage due to excessive heat. If you’re not satisfied with 50%, you may reduce or increase the processor state. As long as you’re happy with the temperature.
If you’re a gamer and using Nvidia graphic cards, you may follow this additional tutorial so you can play games with the best performance.
So that’s all. Pretty easy and doesn’t cost you any money, right? With these settings, I am much happier now that I can go render and encode some videos without having to worry about the temperature. I can even play games at 1920x1080 resolution with low to medium graphic settings, and the temperature sits at around 60+- degree celcius~ That’s a 30 degree celcius drop in temperature!
I hope this post will be able to help people who’s struggling with the same problem as me. If you have another suggestion, feel free to share it.
No comments:
Post a Comment